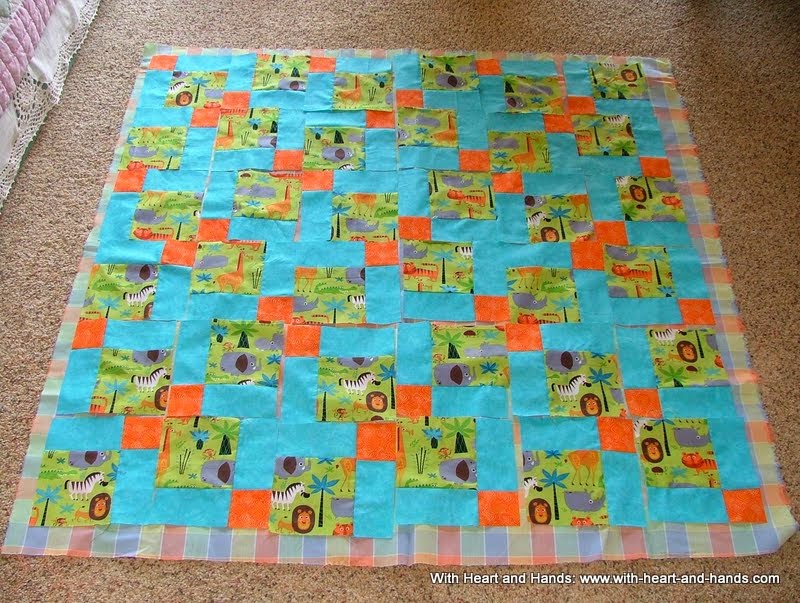
The simplest of the 'Disappearing' patch quilts is the one created by the wonderfully versatile 9 patch.
I forgot to post my own tutorial when I gave you my wonder big list of wonderful tutorials. And since I had all of the photos and basic instructions ...more or less..still in my memory. I am adding it in!
And the easiest and quickest way to make it is by creating first, strips sets for each color block strip, and then creating simple 9 patch blocks that are then cut into fourths..one cut vertically, one cut horizontally. (warning: I could find a photo of the second cut so reused the first one's photo!)
Photo tutorial for making a D9P Quilt:
Making a Disappearing 9 Patch Quilt
1.Cut your fabric strips. You will be using strips sets with three rows each in two different color combos. Using the chart, select the finished quilt size to determine the number and sizes and combos of strips needed.
Following these instruction to....make your strip sets.
2.Taking your main fabric plus an accent fabric, create a row of three strips.
3. From this strip set you will then cut your block strip sets as shown...
3 b. .....from each color combo sets
4. Arrange strips into a nine patch arrangement.
5. Then sew seams together to create the 9 patch block.
6. Cut once vertically in half, then the second cut horizontally in half.
7. Rearrange those recut blocks as shown.
8. Place all of these blocks into the disappearing quilt lay out. And then, simply sew all of the seams together.
9 Finish as you would with any quilt..add batting, backing, quilting and binding. And by the miracle of bloggervision...it's finished!
A wonderfully fun and relatively easy quilt to make...it sure beats making the blocks one by one to use strip piecing, doesn't it?
Now, that you have this one under your belt..time for my blog post corollary!


2 comments:
I DO like to make this one! It works well for a QOV.
Cute! Love your animal print!
Post a Comment